PhotobucketPhotobucketPhotobucketPhotobucketPhotobucket
Showing posts with label DIY. Show all posts

Tuesday, September 23, 2014

Nolan's new room

Over this summer our Fun List had "Room Re-dos" on it.
Well that project extended a little past summer and into this new school year.  But all good things come with time.  
Today I wanted share Nolan's new room.
We hadn't done much since his room was originally done as a baby, other then get him a big boy bed.


We wanted a room for him to grow with. 
The feel more of a little mans room.
So we got things that reflected his interest but made for a cozy place for him.
{vintage flag from a local shop, Thor Hammer night light from Target, quilt and buffalo plaid bin from Land of Nod}


We had a lot of pieces from the Ikeas Trofast collection from the playroom.  We are planning on a redo in there as well, so instead of selling it all I decided to update it, see below for more details.

Our walls are EXTREMELY textured, almost like an outside stucco.
So wall paper is out of the question but we still wanted a focal point on this wall.
I used Urban Wall Decals to create this strip of Batman Masks.


We wanted to bring in original artwork that shows Nolan's most favorite things. This wall is a work in progress but I love it.  And the pennants from my husbands childhood adds just the right amount of vintage charm to this wall. 


I love kids to have a space to sit other then the floor or bed in their rooms.
We snagged this chair from Target, its the most perfect size.
Yellow bin also from Target and the AMAZING Biggie pillow from Passive Juice Motel.


My favorite thing in his room has to be his new Lego table.
Its the perfect thing for my Lego obsessed little dude.
More info below on this project.


I love the little details his room holds.  
But most of all I love that when I can not find him I know exactly where he is, using his imagination in his room.

_______________________________

DIY Lego table.
Like I said above we already had the Trofast collection.
I took one of the pieces and painted it using Milk Paint from Nook and Cranny.


I was able to paint both this piece and the smaller shelf with one pint, milk paint is that amazing.
After it was completely dry I applied some bees wax just to cure the paint since the piece was going to get a lot of use.


For the lego top, I used two large gray lego mats for each side and cut down one blue mat to create the center strip. Cutting lego mats is easy peasy, create a line with some brick legos take an exacto knife and cut along edge. Then snap off.


Lastly, I used gorilla glue and weighted them down.


I can not even begin to tell you how much time he spends at this table.
He wakes up and goes right to it and at night he setups his favorite guys of the day on the edge to "watch over him" when he sleeps.


 I hope you enjoy a glimpse into Nolan's new world.
XO


Monday, December 9, 2013

DIY Christmas Cork Board Card Holders

This past Thursday I had the privilege of attending The Meet and Make hosted by the ridiculously cute Sarah Hearts. 
And upon our arrival we were given swag bags and among they adorable items was some Christmas wrapping paper from HelloHeyYo

I immediately thought there was no way I was going to be able to cut it up, tape it, then sit back and watch someone tear it up and throw it to the ground.
Yes, I was that in love.
To set my heart palpations at ease, I came up with a little DIY ensure future use and viewing pleasure of the paper.

Ok side note:
When I started this I thought the tacky spray would be a good call, which much to my frustration it was not.  Do just pretend that is not even in the photo below.

Get you some awesome HelloHeyYo paper
Cork boards, I got a 4 pack from Target.
Mod Podge and foam brush
And a coordinating spray paint.


First thing I did was lay the boards on the paper to figure out the best layout.  Then traced them on the paper and trimmed.


The paper was going to be a little short so I spray painted the edges gold when I sprayed the other to boards.


Take a good amount of mod podge to the boards.  Then lay paper down and mod podge the tops.


Dry and hang with some 3m strips.
As you can see in the photo below, my top left one got some serious creasing.  This is the one I used the spray adhesive on. Insert my frustration. 


These boards are our new card holders.  
Just a little straight pin action to hold them in place.


The paper is seriously amazing.
And Rebecca has so generously offered a $5 off a $25 purchase.
Enter HELLOJELLYBEAN
And you have til Dec 13 for a Christmas delivery time.

PS:  This is totally not just a Christmas project.

Before I go, here is our fam bam card for this year.

ENJOY!


Tuesday, October 15, 2013

The Crafty Social Ticket Giveaway


You guys. Big things have been happening behind the scenes for The Crafty Social. The big night is a little over a month away and we are so excited to continue to share more behind the scenes with you.

We have partnered with some great companies for the event. Our swag bags alone are valued over $90... each. We will have some really great desserts donated by local vendors. It will be very Yum Yum-my... if you get my drift. WINK

We have also brought some amazing local ladies on board to help with the event. Jelli of Peplum Events is helping with some event decor and Sarah of Sarah Hearts will be teaching one of our DIY's.

Saturday November 16th from 7-10pm at Downtown Credo. Locals! Be there or be square. The first part of the night (7-8:30) will be a free mixer. Come hang out, eat some desserts and get to know other local ladies. Then grab a ticket and stay until 10pm to get one of those amazing swag bags, be entered into a fab door prize and learn to DIY. We are providing all supplies and instruction so all skill level crafters are welcome!

Oh yeah- the giveaway...
One lucky winner will get a ticket, the swag bag and all the DIY goodness for free! Enter below and good luck!


*disclousure: giveaway participates must be local to the orlando area OR able to provide their own transportation*


Friday, October 11, 2013

The Crafting Social {Orlando}

About 2.5 years ago, Sara and I took our internet friendship into the real world.
It was never awkward, it was just good.
So we both know the internet is real and filled with opportunities for people to get together in real life.
Since then we have both had this little nugget of an idea sitting in the corner of our minds.
We have both had our reasons for not poking that idea around over that time, would people want to come, schedules, having a baby, you know stuff.
But recently we both decided to throw caution to the wind, grabbed the biggest stick we had and poked that nugget right in the belly and we are super excited to present The Crafty Social {Orlando}.


We are inviting our Central Florida peeps to come for a night of mingling and crafting.
There will be an open house style mixer for 1.5 hrs followed by a paid seat crafting session.
The crafting session, for ALL levels of crafter, will include two DIY crafts, with one craft being presented by the UBER talented Sarah Hearts {people she has been featured in Better Homes and Garden}, and a swag bag that as it is right now is valued at around $90!!! 
You read that right, $90 swag people, now that crazy.

So hop on over to The Crafty Social {Orlando}
check it out and buy a ticket before the limited seats are gone!!

Hope to see you there!


Monday, October 7, 2013

Skull Cake Stand

Hello.
Been a minute since I have blogged.
Sorry.
But did a little Halloween craft on the cheap the other day and thought I would share.

What you need:
Plastic plate from Target for $1.99
Glitter skulls from Michael's $1.99 for a package {I used my 40% off coupon to make them even cheaper} X2
A candle holder, I had one on hand.
Some gorilla glue
Hot glue gun


First thing first, gorilla glue the plate and stand together, add something heavy to the top and let sit till dry.


Then with a hot glue gun get to adding some skulls around the edge.


And thats it.  
Doesn't get easier then that I say.


Enjoy!

Tuesday, September 10, 2013

DIY Frankenstein Pinata

I had the honor of hangin with the eighteen25 girls for the second year in a row during their
Spooktacluar September.

Last year I made this.
This year I made this.


He is perfect as a decoration and/or to beat with a stick.

No worries no Frankies were harmed during the creation of this blog post.


Thank for having me again ladies!

And make sure to check out their blog for more amazing halloween creations!

Tuesday, November 27, 2012

Elf on the Shelf Door on the Cheap, $3 to be exact.


Lenny our Elf does not make his official appearance until Dec 1.
But in prep for his arrival, he has requested a door for easy access to and from the North Pole.
See we are finding at 6.5 years of age Buggie has A LOT of questions about how things work, and if they are real.
And this Momma is NO WHERE near ready to give up the magic.
So I went to Joann's and came home with the workings of a Elf Door.

For $3 I came up with this.
- Picture frame $3.99 but after a 40% off coupon paid $1.80
- Bag of little knobs $1.99 but after my 40% off coupon paid $1.20
- paint which I had already
- bag of sticks which I had, but are around $2
- hot glue gun


After measureing the sticks to the back of the frame I was able to just cut them with regular scissors. 


Then painted everything and hot glued it together. 


And added a "Elf Only Entrance" to it. And I was done, yep that easy and that cheap.


When Lenny comes Saturday he will come with a little note explaining the door and that Santa felt it was a good addition for the Elves. 

Fingers crossed that this helps keep the magic alive and filling our house this Christmas!

Thursday, November 15, 2012

Nolan's Big Bad Monster Truck Bash


I am still trying to come to terms with the fact that my little man turned three last week.  I honestly have NO idea how it happened so fast.  One day my water was breaking and the next I am planning his 3rd birthday.  But lets keep it real, the kid is still in diapers and sleeps in a crib {we did order a big boy bed this weekend} the diaper thing we are working on, so I guess he is still a baby in some ways...

He is a boys boy, in that he is WAY into trucks, car, trains, and pretty much anything that moves.  When we asked him what kind of party he wanted his first and only response was "monster trucks".
And if you know me from parties past, I am always teaming up with my girlfriend Kori. Paper and Pigtails to make party magic. After choosing colors and a concept, Kori went to work and I starting gathering, buying, and spray painting , the things I do best.


For his backdrop I wanted something that made me think of a winners circle at a Monster Truck Rally. I took him to a local car parts store that always has a "monster truck" outside, and after getting permission to take a few photos, I took the winning image to Staples and had them print an engineer print.  They were able to scale it just almost fit perfectly on a piece of foam board I had purchased, total cost for the board and print was $10.  


Then I took spray adhesive and worked from the top down in sections.  Once it was on, I took tissue paper and hole punch it to make confetti and then glue sticked it down.  


Right after we chose Monster Trucks, I was at Target and they had these trophies in the dollar bin {they were really $2} for Halloween costumes.  The water bottle labels Kori made fit perfectly on the base.
Then I took pans I got at the Dollar Tree and spray pained them, finally I Gorilla Glued them together to create a CHEAP but fun cupcake stand!


I love the idea of bite size cookies as cupcake toppers, like I did here, and Renee from Bee's Knees Creative made that happen yet again with these little tires.  She also made an amazing "BIG" cookie for Nolan.


Other treats included "Mud Buddies" in my oh so favorite snack cups from Kori.


Chocolate Doughnut Spare Tires


LARGE Marshmallow Bolts {Take marshmallows on paper straws, quickly dunk in water, then roll in sugar sprinkles.}


Oreo Pop Rocks, because I can NEVER have a party without them, people will not come. 


Brownie Dirt Ramps aka boxed brownie mix made from the directions but added crushed peanut butter Oreos on top before baking.


And for good measure we bagged up some popcorn to add a little bit of salt after so much sweet.


And just to finish things off I got paper fans and streamers from Party City for the backdrop.


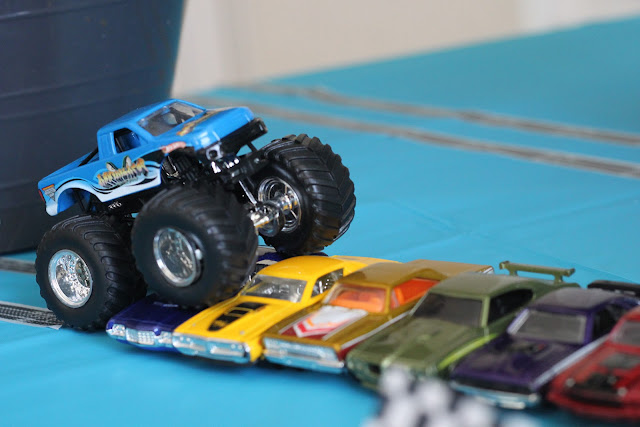
And of course add some Monster Trucks and their tracks to the table.  I scored the tire track tape here.


And lastly was the favor table. Being the week after Halloween I was not about to give candy. So I found these monster truck tire cups, mini trophies, and monster truck tattoos, on Birthday Express.

I also purchased some checker duck tape from Micheals, I wanted to buy fabric but the tape was SOOO much cheaper after my 40% off coupon.  I added it to my mirror then hung photos of Nolan on it.  It was easy to just add throughout the tables.


The cups came with a monster truck sticker on the front and back, but I decided to cover it.  I took the party circles Kori made, printed them on sticky paper and punched them out. I also used them on the blue and yellow traffic cones I scored at the Dollar Tree.


For the "Winners Circle" sign I used this DIY from Smile and Wave. 


I hope you are all still with me after such a long post.
And if you are then you will her me say, it was a success.
From my friend Kori's partnership in creating fun paper goods, to the DIY's, to the weather, to the food, to my sweet little three year old boy!

Please free to ask any questions!

PS:
I made his shirt, using a freezer paper stencil and some black fabric paint.