PhotobucketPhotobucketPhotobucketPhotobucketPhotobucket

Friday, December 14, 2012

New Years Card and a Printcopia Winner

I have never been good at getting a photo, card together and out the door in time for the holidays.
It's especially hard when half our family celebrate Hanukkah, and that starts at a different time every year {lets not even bring up the fact that it starts the day before Thanksgiving next year!}
So we shoot for a New Years card, and some years even a Valentines Day card.
Here is a few out takes from this years card...


The kids shirts are from Hello and Hi Apparel . Lets just say I am smitten with the whole line, I own the Hello sweatshirt and it is like wearing butter, so deliciously cozy.


And here is the final product.
Nothing fancy.
Just my kids being themselves and stating their goals for 2013...


I am also entering our photo in the ThePaperMamas Holiday card contest over here.

And side note, I just want to thank Jess from IRockSoWhat, for sharing her free arrows and the EASIEST tutorial on how to make them brushes, I mean a standing ovation on that one!!

_____________________________
And super sorry for the delay on this, the winner of the Printcopia giveaway is...
comment #8 Gretchen P.

Email me chica I have your code to get the free 8x10 canvas.

Tuesday, November 27, 2012

Elf on the Shelf Door on the Cheap, $3 to be exact.


Lenny our Elf does not make his official appearance until Dec 1.
But in prep for his arrival, he has requested a door for easy access to and from the North Pole.
See we are finding at 6.5 years of age Buggie has A LOT of questions about how things work, and if they are real.
And this Momma is NO WHERE near ready to give up the magic.
So I went to Joann's and came home with the workings of a Elf Door.

For $3 I came up with this.
- Picture frame $3.99 but after a 40% off coupon paid $1.80
- Bag of little knobs $1.99 but after my 40% off coupon paid $1.20
- paint which I had already
- bag of sticks which I had, but are around $2
- hot glue gun


After measureing the sticks to the back of the frame I was able to just cut them with regular scissors. 


Then painted everything and hot glued it together. 


And added a "Elf Only Entrance" to it. And I was done, yep that easy and that cheap.


When Lenny comes Saturday he will come with a little note explaining the door and that Santa felt it was a good addition for the Elves. 

Fingers crossed that this helps keep the magic alive and filling our house this Christmas!

Monday, November 26, 2012

Printcopia Wrapped Canvas Giveaway {Nov26-Nov29}


Hello.
Its me.
You know that one lady that comes and goes out of the blogging world like a fine mist on a chilly morning.
You know another thing I am bad at?
Getting photos printed from our family photo sessions, like the ones we had taken by Emily back in APRIL, yep APRIL, as in 6 months ago.

So when I was contacted by Printcopia to try out their wrapped canvases, I knew right away what I wanted to have printed.  Emily had captured this great little trio of photos with the kids and I had wanted them lined up on the wall.  


It was such an easy process to have them made.  Straight forward as straight forward can be.
- Pick a canvas size
- Upload you photo {ready for the genius part?! You can upload from Instgram and/or Facebook!}
- Then you pick you boarder {mirror image, image wrapped, or color}
Easy peasy.


When they came I decided to hang them with Velcro, I find it is the best way to keep photo from shifting on the wall.   And lastly, I took some washi tape and framed it out.


The nice people at Printcopia are wanting to share the canvas lovin and would like to give one of you fine folk a free 8x10 canvas!

You have up to three ways of entering {remember to leave one comment PER entry}:
- Leave a comment here that you are entering.
- Follow Printcopia on Facebook
- Follow Printcopia on Twitter

Good luck chucks.
You have until midnight on Nov 29th
Picking a winner on Friday Nov 30th


Thursday, November 15, 2012

Nolan's Big Bad Monster Truck Bash


I am still trying to come to terms with the fact that my little man turned three last week.  I honestly have NO idea how it happened so fast.  One day my water was breaking and the next I am planning his 3rd birthday.  But lets keep it real, the kid is still in diapers and sleeps in a crib {we did order a big boy bed this weekend} the diaper thing we are working on, so I guess he is still a baby in some ways...

He is a boys boy, in that he is WAY into trucks, car, trains, and pretty much anything that moves.  When we asked him what kind of party he wanted his first and only response was "monster trucks".
And if you know me from parties past, I am always teaming up with my girlfriend Kori. Paper and Pigtails to make party magic. After choosing colors and a concept, Kori went to work and I starting gathering, buying, and spray painting , the things I do best.


For his backdrop I wanted something that made me think of a winners circle at a Monster Truck Rally. I took him to a local car parts store that always has a "monster truck" outside, and after getting permission to take a few photos, I took the winning image to Staples and had them print an engineer print.  They were able to scale it just almost fit perfectly on a piece of foam board I had purchased, total cost for the board and print was $10.  


Then I took spray adhesive and worked from the top down in sections.  Once it was on, I took tissue paper and hole punch it to make confetti and then glue sticked it down.  


Right after we chose Monster Trucks, I was at Target and they had these trophies in the dollar bin {they were really $2} for Halloween costumes.  The water bottle labels Kori made fit perfectly on the base.
Then I took pans I got at the Dollar Tree and spray pained them, finally I Gorilla Glued them together to create a CHEAP but fun cupcake stand!


I love the idea of bite size cookies as cupcake toppers, like I did here, and Renee from Bee's Knees Creative made that happen yet again with these little tires.  She also made an amazing "BIG" cookie for Nolan.


Other treats included "Mud Buddies" in my oh so favorite snack cups from Kori.


Chocolate Doughnut Spare Tires


LARGE Marshmallow Bolts {Take marshmallows on paper straws, quickly dunk in water, then roll in sugar sprinkles.}


Oreo Pop Rocks, because I can NEVER have a party without them, people will not come. 


Brownie Dirt Ramps aka boxed brownie mix made from the directions but added crushed peanut butter Oreos on top before baking.


And for good measure we bagged up some popcorn to add a little bit of salt after so much sweet.


And just to finish things off I got paper fans and streamers from Party City for the backdrop.


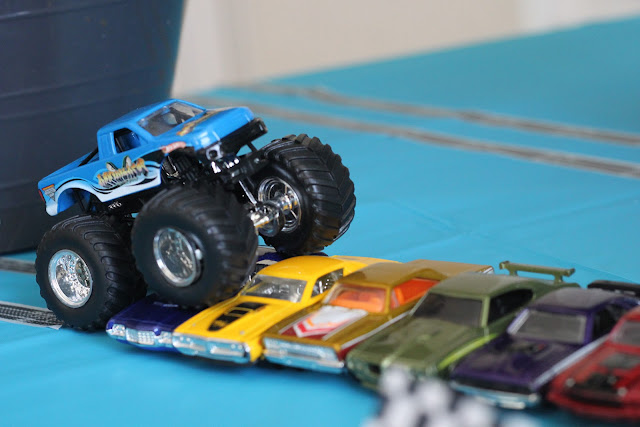
And of course add some Monster Trucks and their tracks to the table.  I scored the tire track tape here.


And lastly was the favor table. Being the week after Halloween I was not about to give candy. So I found these monster truck tire cups, mini trophies, and monster truck tattoos, on Birthday Express.

I also purchased some checker duck tape from Micheals, I wanted to buy fabric but the tape was SOOO much cheaper after my 40% off coupon.  I added it to my mirror then hung photos of Nolan on it.  It was easy to just add throughout the tables.


The cups came with a monster truck sticker on the front and back, but I decided to cover it.  I took the party circles Kori made, printed them on sticky paper and punched them out. I also used them on the blue and yellow traffic cones I scored at the Dollar Tree.


For the "Winners Circle" sign I used this DIY from Smile and Wave. 


I hope you are all still with me after such a long post.
And if you are then you will her me say, it was a success.
From my friend Kori's partnership in creating fun paper goods, to the DIY's, to the weather, to the food, to my sweet little three year old boy!

Please free to ask any questions!

PS:
I made his shirt, using a freezer paper stencil and some black fabric paint.

Friday, October 26, 2012

Halloween came a few days early...

Howdy Y'all!
We gathered up the Toy Story gang and headed out to Disney for some "Not so Scary" fun.
I have to say dressing up for Halloween is super fun, but doing it as a group takes it to the next level.
The kids got such a kick out of people referring to us as "the Toy Story Family" {and maybe Momma got a little kick out of it too}.


The best part was walking over and seeing that the new Fantasyland was open for a dress rehearsal, this is HUGE people.  I mean to walk on a ride that when it opens will have no doubt an 1hr+ wait and it took us 5 mins to wait, WAS AWESOME!  Sorry I am still a little geeked out by this...


Needless to say for anyone thinking if it worth the extra money for a "special" event at Disney, I vote YES! 
 XOXO

Monday, October 1, 2012

BOOing, snail mail style.

We are HUGE fans in this house of Booing our neighbors.
Its turned into such a fun tradition, that we are have been the family to start it each year.
The other day I was making some fun tissue tassels, and thought I knew a few friends that would find them a fun little halloween treat.  So why not BOO! through snail mail?!  
I put together this little card to include in my package...


For the tassels I used this tutorial, I bought tissue paper at Party City for .99 a package, and with only using a sheet per tassel it was a SUPER cost effect project.  Then I wrapped it up with enough yarn for them to be hung and included some stars for added bling.


Here is what I did with mine...


I excited to see the snail mail BOOing take off and other join in the fun.  Please share if you do send something off, I would love to see it!
Happy Halloween Month.