


Let me start by saying sorry for the photos in this post {I did this back when I was operating with only my phone}.
Ok so just wanted to share a little project today. Strawberries season is just about over here in Florida {BIG BUMMER}. But thought I would share a little strawberry love with a strawberry clippie.

Here is what you will need:
- Fabric glue
-Hot Glue
- Scissors
- 4in piece of red swiss dot ribbon in 7/8in. {I used red and black but red and white would work just fine}
- 4in piece of green ribbon in 1/4in.
- A clip of your choice {snap clip or clippie}

Fold over the Red Swiss Dot ribbon over to make a cone shape the width you would like. May want to hold the clip behind it to see if it will cover.

Using fabric glue, glue down one side.

Then glue down the other half.

You should have your cone shape back when done.
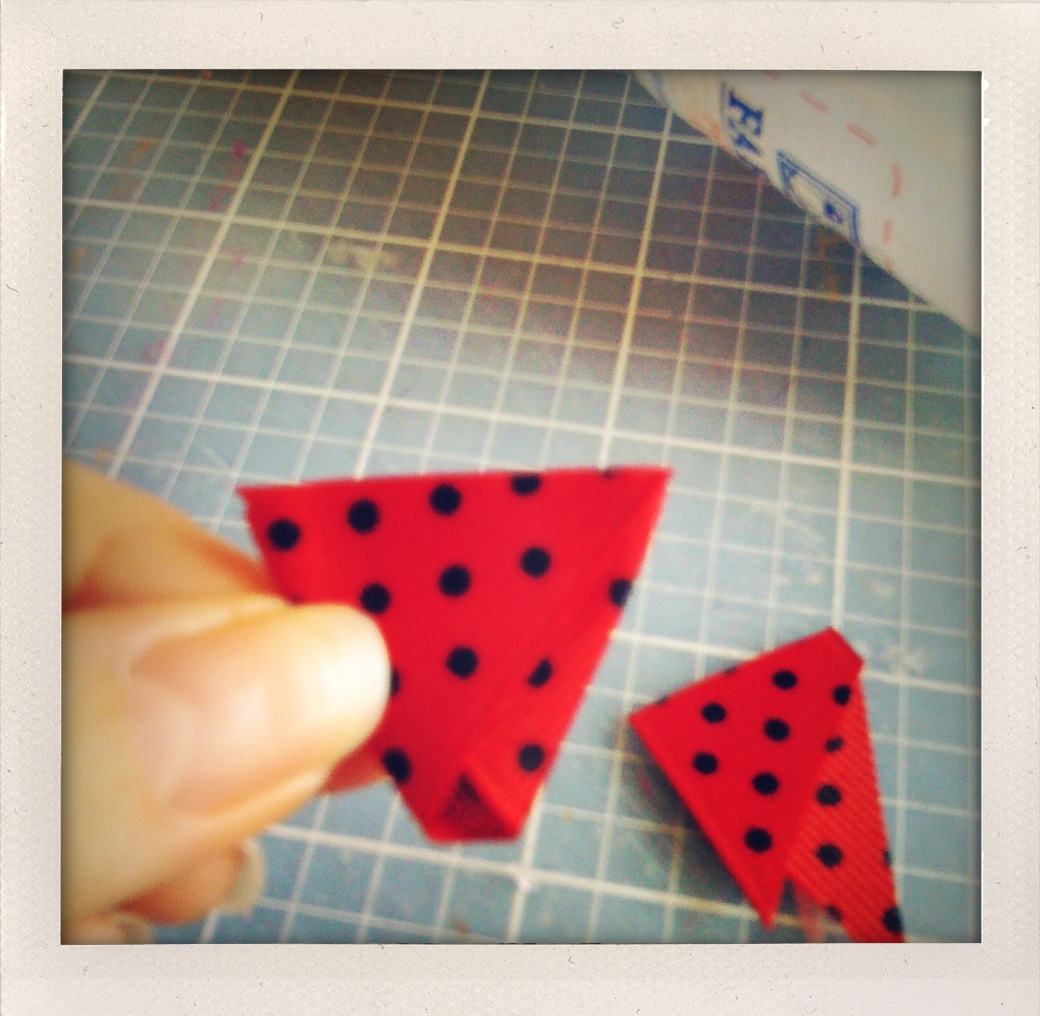
Then cut straight across the top.

Next take your green ribbon and cut the end at an angle.

Then fold over and snip the other end to make leaves, like above. glue down the leaves in the center of your fold. Repeat this one more time. So you have two leaves.
{I would take a lighter to the ends to prevent fraying at this point.}

To make the stem take the remainder green ribbon and add glue on one side of it.

Then fold in half {you may need to hold it closed while it dries}.
Ok so I am missing picture of the assembly but it is pretty straight forward. Glue the stem to the back of the strawberry then glue down the leaves across the front top. {It should like the picture below once complete}. Once done hot glue to the clippie.

Again I apologize for the pictures, please let me know if you have any questions...
Happy crafting!
1 comment:
love it!!!
Post a Comment