PhotobucketPhotobucketPhotobucketPhotobucketPhotobucket

Monday, September 17, 2012

DIY Fall Hanging Art

So, its officially Fall.
And the only reason I know this to be true is Starbucks released PSL 
{for those not in the know thats a Pumpkin Spice Latte}.
And since I base all change of seasons off Starbucks drink rotations, I decided some fall decorations were in order.

WAAAAY back in the blogging day, Eighteen 25 Girls had blogged this really fun technique for painting with corn syrup.
I had always wanted to try it, so I thought this was a perfect time.
I teamed up with my buddy Kori from Paper & Pigtails to help come up with some
cute fall images to use for this project, they can be downloaded here 
{Feel free to use these for other fall projects, just remember they are for personal use only}

So what you will need:
- Corn syrup
- food coloring
- freezer paper
- printed sheet of images
- black crayon
- paint brushes
- small bowls at least 5
- tape
- scissors
- fishing line or something similar
- a branch


First thing will be to lay your printed images under some freezer paper {shiny wax side down} and tape it in place.  Then with a black crayon trace them out.


Once you have traced as many images as you want, take a tbsp of corn syrup and mix in a few drops of food coloring, I made orange, red, yellow, green, and brown. And start painting.  You want it to be a little thick in the application.  And the cool thing with the crayon is if you get some corn syrup on it, the wax propels it and it will disappears off it.

                            
These will take at least 24 hrs to dry.  

Once they are dry cut them out. Then I took a tiny hole punch to each one and strung up a branch above our table {I have a little hook up there all the time for hanging things} And then started hanging the pieces.  The owls I decided to add to the branch as though they are perched...


I love how it turned out!  
Another option would to be make a garland to hang around the windows to still get the stained glass affect they give.

ENJOY!


Friday, September 14, 2012

Chicken and Fried Quinoa


You may or may not know my feelings about quinoa.
But lets just say, I love it.
Which basically makes me think about different ways of using it during the week,
This week I made a Chicken and Fried Quinoa dish.
And the best part of this dish, the chicken can easily be replaced with tofu for a veggie dish.

Here is what you need:
- 1 cup uncooked quinoa
- 1lb to 1 1/2lbs of fresh chicken tenders - chopped
- 1/2 cup chopped onion
- 1 cup frozen peas and carrots
- 2 eggs
- 1/3 low sodium soy sauce
- 2 cloves chopped garlic
- 1 teaspoon grated ginger
- 1 teaspoon sesame oil
- canola oil

Cook the quinoa per bag instructions.
Once quinoa is cooked, heat a tsp of canola oil in large skillet over medium high heat.
Add garlic and ginger a cook until garlic starts to turn brown, then add chicken with sesame oil.
Cook chicken through about 5 mins.
Add eggs and scramble.
Remove from pan.
Heat some more oil and add onion, carrots, and peas, cook for 5 more mins.
Then add quinoa  and soy stirring, for another 5 mins.
Lastly add back chicken and eggs {with any juices}.
Serve right away with a little chopped scallion and sriracha. 


ENJOY!

Wednesday, September 12, 2012

DIY Reusable Produce Bags


A few Christmases ago my girlfriend gave me a bunch of reusable produce bags.
Well fast forward to this past weekend and I found myself down to two bags.
And when 90% of your shopping happens in the produce section they come in real handy.

So when I got home I gathered up a few things I had around to make some more.
What you will need:
- tulle fabric, stiffer the better {thats what she said} sections cut in 9 1/2in x 13in two for each bag, I folded mine so my two pieces were already attached at the bottom
- twine or thin ribbon
- sewing machine
- scissors


I sewed up both sides of the bag 1/4 inch in.


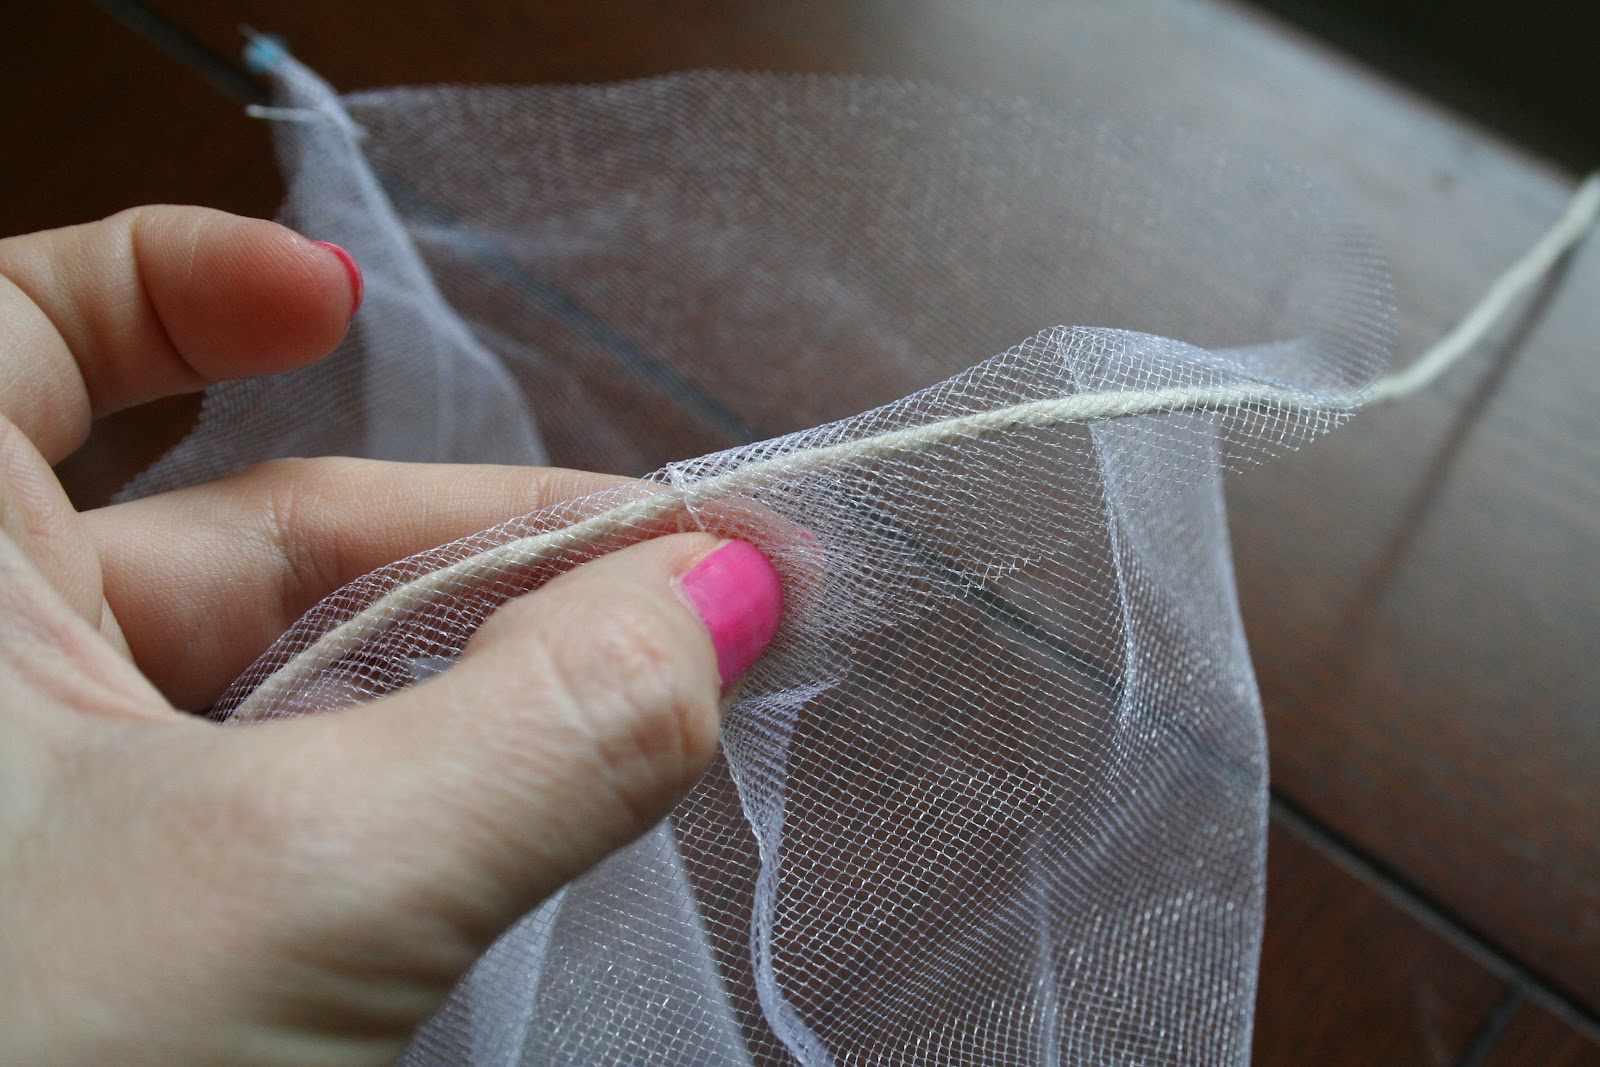
Then laying the twine down and then turn the top over.


Then cut a small hole on the each side of the seam on one side to pull the twine through.
So the cord ends inside the bag. Then sew the fold over down all the way around.  


Turn inside right, tie the ends of the twine together and BAM you have reusable produce bags.


Now run off to Wholefoods or the farmers market and dazzle all crunchers people around you when they ask where you got your bags, and say, "Oh these? Just a little something I whipped up."
PS: would make a great housewarming gift, filled with fun little household items.

Enjoy!

Monday, September 10, 2012

DIY Skull Tees {and guest post}


Today I have the honor of guest hosting on the eighteen 25 girls blog!
They have a spooktacular September, and everyday posting great Halloween projects and giveaways.
After making my project for them, my mind started turning and thought it would be cool to make some tees.

But instead of using freezer paper, cause the thought of recutting the stencil over and over made my head hurt.  So I came up with another approach.

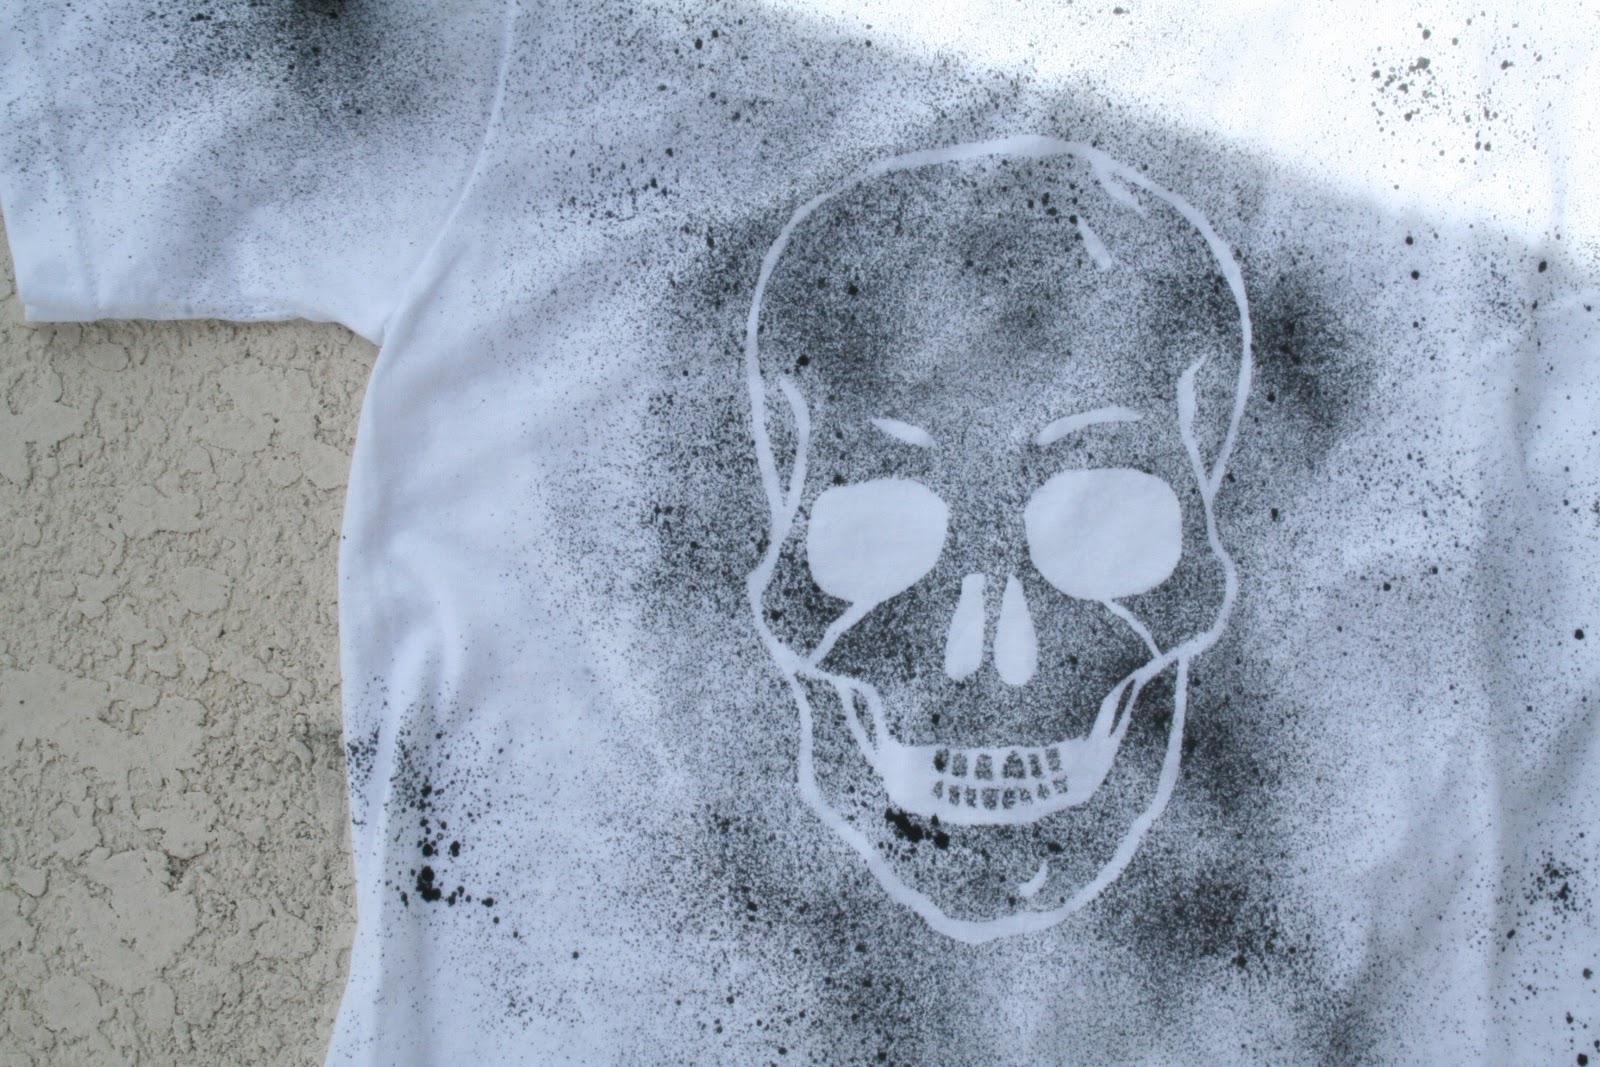
I took a plastic divider and cut a reusable stencil out of it.
For my details on cutting out the stencils check out my guest post.


Then to stick it on I used a little double sided tape. Just cutting around the stencil so it fit the back.


And for this project I made two different versions, a bleached one {which again check out my guest post for details} and a black dye version. Which is pretty straight up, stick the stencil down and spray.


I cut the neck off mine and the bottom 3 inches off.  And then took some gold paint and gave mine a gold chompers.  


{photo credit to my sweet husband who walked away from the TV on the first football Sunday of the season to take these for me}

They rock the casbah!

Again to see how this skull madness started head over to eighteen 25 to see how this "cool guy" was made... 


Here are a few projects of Halloween past:

http://eighteen25.blogspot.com/2012/09/please-welcome-amy-from-buggie-and.html

Thursday, September 6, 2012

Peanut Butter Protein Balls


I have been seeing different versions of these popping up on Pinterest.
I loved the idea of a healthy little protein/fiber packed snack just sitting in the fridge.
But most of them had things either that I did not have on hand or would HATE to eat {shredded coconut, which to me has the texture of finger nails}.


So I picked a few things from several different recipes and here is what I came up with:
- 1 1/4 cup natural creamy peanut butter
- 1 cup honey {if you can get your hands on local honey this is a HUGE benefit with allergies}
- 1 1/2 cups powdered milk
- 3 cups rolled oats
- 4 Tbsp flax seed meal 
- 1 cup raw sliced almonds

You pretty much just add everything to a bowl {minus the almonds} and mix {I used my stand mixer}.
Once all mixed using your hands mix in almonds.

Then roll into three to two bite size balls.
You should get around 30.
Place in freezer for 45 mins.
Then transfer to a airtight container or ziploc and keep in fridge.


Prefect little pre work our snack, midday boost, or even a little dessert.
My kids LOVE them.


Enjoy!

Tuesday, August 21, 2012

Arm Candy Swap Party!

A few weeks ago I signed up for an Arm Candy Swap Party.
Cause I love me some candy.

And when I got my partner email, I am not going to lie I was a little confused and had to read it twice.
First my partners name was Amy, last I checked that was mine.
Then I read she lived in Florida, hello my address is in Florida.
And her an answer to her to her childhood celebrity crush was Joe McIntyre, my childhood walls where plastered with Joey Mc, posters like it was wallpaper.
Which made me think Leonora had lost her mind and partnered me up with myself.

But NO, there is actually another one of me out there, its

So then my mind went to holy crap Leonora partnered me with a legit jewelry maker.
And by legit people, I mean she is even living her dream of opening a brick and mortar shop!!!
Then it came to actually making bracelets for a legit jewelry maker.
Yep, that much anxiety, haha.
So after making her candy, I sent it off.
With fingers crossed that nothing broke before she could get a photo of it!
Then Amy reassured me, it was all good in the hood since she actually had REAL jewelry making tools, not her husbands tool box tools, so she could fix it!


 Then my package came, I was over moon with the fun items Amy made for me!
I loved the variety in the bracelets, making them for fun all different outfits.


I would have included more shots of me wearing them, BUT I have some seriously veiny old lady hands that I did not want you to lose your breakfast!

It was super fun to go out side my comfort zone and make jewelry and a new friend!
Thanks Leonora and Ilene for hosting such a fun swap.

Now head over to see all the swap partners links!

Thursday, August 2, 2012

Mom in the shot {Seeing myself}

I find myself looking in the mirror a lot, but not in the traditional sense but in the seeing myself in my daughter sense.
The physical similarities are undeniable... 


I feel myself working everyday to make sure she shines.
That I force myself to sit back and let her work her magic.
There is a little bit of me rubbed off in there for sure.
But I strive to keep it at a minimum.
But in the end if she turned into me, would that be a bad thing?

Linking up with Emily...